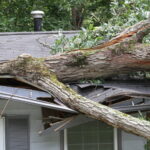
Water damage can happen at any moment, whether it is due to a leaky roof, broken pipe, or natural disaster. The aftermath of such an incident can be devastating, leaving you with a damaged property, ruined possessions, and potential health hazards. The restoration process is crucial to get your life back to normal, but it can be challenging to know where to start. This article provides you with a comprehensive guide on water damage restoration and offers expert tips to help you through this difficult time.
Step 1: Safety First
The first thing you should do after a water damage incident is to ensure your safety. Turn off the main power supply to the affected area and avoid entering the affected room if there is a chance of electrical shock. If the water is contaminated, wear protective gear, including gloves, a mask, and goggles, to avoid any health hazards.
Step 2: Contact a Water Damage Restoration Professional
Once you have secured your safety, it is time to contact a water damage restoration professional. These professionals are trained and equipped to handle all types of water damage incidents, and they will be able to assess the extent of the damage and develop a plan of action. They will also be able to advise you on the best course of action to prevent further damage and minimize the restoration cost.
Step 3: Document the Damage
Before the restoration process begins, it is important to document the damage for insurance purposes. Take photos and videos of the affected area and make a list of all the damaged items. This documentation will also be useful for your insurance claim.
Step 4: Remove Excess Water
The next step is to remove the excess water. This can be done using a combination of techniques, including pumping, vacuuming, and mopping. It is important to remove the water as soon as possible to prevent mold growth and minimize further damage.
Step 5: Dry the Affected Area
Once the excess water has been removed, the next step is to dry the affected area. This is crucial to prevent mold growth and to restore the structural integrity of the building. Professional water damage restoration companies use high-tech equipment, such as dehumidifiers, air movers, and fans, to dry the affected area.
Step 6: Clean and Sanitize
The final step in the water damage restoration process is to clean and sanitize the affected area. This involves removing any remaining moisture, as well as cleaning and sanitizing all surfaces to prevent the growth of mold and other harmful pathogens. Professional water damage restoration companies use specialized cleaning solutions to effectively clean and sanitize the affected area.
Expert Tips for Water Damage Restoration
Act quickly: The faster you act, the less damage will be sustained, and the more successful the restoration process will be.
Avoid DIY solutions: Water damage restoration is a complex process that requires specialized equipment and expertise. Attempting to restore the damage yourself can lead to further damage and costly mistakes.
Keep all receipts: Keep all receipts for any expenses incurred during the restoration process, including equipment rental and professional services, for insurance purposes.
Document the damage: Make sure to document the damage before the restoration process begins, and keep a record of all damages and repairs for insurance purposes.
Contact your insurance company: Contact your insurance company as soon as possible after the damage occurs to start the claims process.
In conclusion, water damage restoration is a complex process that requires specialized equipment and expertise. Following the steps outlined in this article, as well as seeking the help of a professional water damage restoration company.


